Mastering the Rotary Evaporator: Practical Guide for Lab Users
Introduction
When I first stepped into a chemistry lab, the rotary evaporator looked like a futuristic cocktail shaker. Today, it’s an indispensable tool for solvent removal, concentration, and purification. In this article, I’ll walk you through everything you need to know— from selecting the right model for your laboratory to mastering temperature control, vacuum pump choice, routine maintenance, and essential glassware accessories. Let’s demystify the rotary evaporator and turn it into a reliable side‑kick for your experiments.
1. Choosing the Right Rotary Evaporator for Your Laboratory
Not all rotary evaporators are created equal. The first step is matching the device to your workflow:
- Scale of operation: Small benchtop units (1‑2 L capacity) are perfect for routine organic synthesis, while larger 5‑10 L systems serve process‑scale work.
- Temperature range: Look for models that offer precise control from -20 °C to 200 °C if you work with heat‑sensitive compounds.
- Control interface: Touch‑screen or rotary knob? Choose what feels intuitive for you.
If you’re also setting up complementary equipment, consider reading Vortex Mixer Essentials to pick a mixer that fits nicely on the same bench.
2. Rotary Evaporator Temperature Control – Why It Matters
Temperature is the heart of efficient solvent evaporation. Think of it like cooking rice: too hot and the water evaporates before the grains are cooked; too low and you waste time. Here’s how to get it right:
- Use a water bath or oil bath: Water baths are ideal for low‑boiling solvents (e.g., acetone, ethanol), while oil baths handle higher boiling points (e.g., toluene, chloroform).
- Set a target temperature 10‑15 °C below the solvent’s boiling point. This prevents bumping and loss of product.
- Monitor with a built‑in thermometer or external probe. Modern units provide real‑time readouts and alarms.
3. Vacuum Pump Selection – Matching Power to Need
The vacuum pump determines how low the pressure can go, which directly influences evaporation speed. Here’s a quick decision tree:
- Rotary vane pump: Good for general organic labs; achieves ~0.5 mbar.
- Diaphragm pump: Oil‑free, low‑maintenance, ideal for sensitive or aqueous solvents; reaches ~0.1 mbar.
- Scroll or turbomolecular pump: For ultra‑low pressures (<0.01 mbar) needed in high‑vacuum distillations.
Remember to size the pump for the evaporator’s vapor load. Oversized pumps waste energy, while undersized ones stall the process.
4. Essential Rotary Evaporator Parts & Speed Settings
Understanding the main components helps you troubleshoot faster:
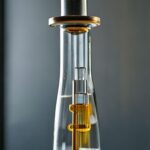
- Rotary flask: Usually made of borosilicate glass; choose a size that leaves at least 1 cm headspace.
- Condensor: Water‑cooled or reflux condensers; the latter recycles solvent back into the flask.
- Motor & speed control: Typical speeds range from 30 rpm (delicate samples) to 200 rpm (high‑viscosity liquids). Start low, then increase gradually.
5. Glassware Accessories – Boosting Efficiency
Beyond the basic setup, a few accessories can save you time and improve safety:
- Receiving flask with a ground‑glass joint: Prevents leaks during solvent collection.
- Distillation head: Enables smooth transition from evaporation to simple distillation.
- Cold trap: Captures volatile solvents and protects the vacuum pump.
6. Maintenance Guide – Keep Your Evaporator Running Smoothly
Regular care is the secret sauce for longevity:
- Clean the water bath: Remove mineral deposits weekly to avoid temperature spikes.
- Check seals and O‑rings: Replace any cracked or hardened pieces every 6‑12 months.
- Lubricate the motor shaft: Follow the manufacturer’s schedule; over‑lubrication can attract dust.
- Inspect the vacuum line: Look for leaks, and replace worn hoses promptly.
7. Safety Procedures – Work Smart, Stay Safe
Even though the rotary evaporator is a workhorse, it can be hazardous if mishandled:
- Wear eye protection and lab coat. The rotating flask can fling liquid if the speed is too high.
- Never exceed the recommended temperature. Overheating can cause solvent flash‑backs.
- Use a proper grounding strap. Static discharge can ignite flammable vapors.
- Vent the exhaust line. Direct vapors to a fume hood or appropriate trap.
Conclusion
Mastering the rotary evaporator is less about memorizing specs and more about developing a feel for temperature, vacuum, and speed—much like learning to ride a bike. By picking the right model, fine‑tuning temperature control, selecting an appropriate vacuum pump, using the proper glassware accessories, and keeping up with maintenance, you’ll turn this complex instrument into a smooth, reliable partner for every synthesis.
FAQ
Q: Can I use a rotary evaporator for aqueous solutions?
A: Yes, but choose a water‑cooled condenser and a vacuum pump that can handle the higher vapor pressure of water. Keep the bath temperature below 40 °C to avoid boiling over.
Q: How often should I replace the O‑rings?
A: Inspect them monthly; replace any that show cracks, discoloration, or loss of elasticity—typically every 6‑12 months for continuous use.
Q: What’s the difference between a reflux condenser and a simple water‑cooled condenser?
A: A reflux condenser returns the condensed solvent to the flask, conserving material, while a simple condenser collects the solvent in a separate receiving flask.
Q: Is a digital temperature controller worth the extra cost?
A: Absolutely if you work with heat‑sensitive compounds. Precise control reduces degradation and improves reproducibility.
Q: Can I run multiple flasks at once?
A: Some advanced rotary evaporators have dual‑flask adapters. Ensure the motor can handle the combined load and that the vacuum pump can maintain the desired pressure.