Déverrouillage de la flamme : votre guide essentiel pour maîtriser le brûleur Bunsen

Introduction: The Unsung Hero of the Lab Bench
When we think about classic matériel de laboratoire, certain images immediately come to mind: beakers bubbling, test tubes swirling, and, of course, the distinctive blue flame of a Brûleur bunsen. This simple yet incredibly effective tool has been a staple in science classrooms and research labs for well over a century. It’s more than just a source of heat; it’s an indispensable instrument for countless experiments, from sterilizing equipment to conducting intricate chemical reactions.
Perhaps you’ve seen one used, or maybe you’re about to use one yourself for the first time. Either way, understanding how this brilliant device works, its various components, what we use it for, its fascinating history, and most importantly, how to operate it safely, is absolutely crucial. So, let’s dive deep and unlock the secrets of the Bunsen burner together!
What Exactly is a Bunsen Burner and How Does It Work?
At its core, a bunsen burner is a device that produces a single, open gas flame. It mixes gas (typically natural gas or propane) with air in a controlled manner before combustion occurs. Think of it like a very precise, adjustable mini-stove burner specifically designed for scientific applications.
The magic happens when gas enters the burner through a hose connected to a `gas valve`. As the gas travels up the burner tube (often called the barrel), it passes by small holes at the base, which allow air to be drawn in and mix with the gas. This gas-air mixture then travels to the top of the barrel where it’s ignited, creating the characteristic flame. By adjusting the amount of air and gas, we can control the intensity and type of the flame, which is incredibly useful for different experimental needs.
Dissecting the Burner: Parts of a Bunsen Burner and Their Function
Even though it looks simple, a bunsen burner has several key parts, each playing a vital role:
- Base: The sturdy, heavy bottom that keeps the burner stable and upright on the lab bench. Safety first, right? We don’t want it toppling over.
- Gas Inlet/Nozzle: This is where the gas hose connects from the lab’s gas supply. It’s crucial to ensure a tight, secure fit here to prevent gas leaks.
- Barrel/Chimney: The vertical metal tube where the gas and air mix before ignition. Its length and diameter are designed to optimize this mixing process.
- Air Vent/Collar: Located at the base of the barrel, this adjustable ring (or sometimes a fixed set of holes) controls the amount of air entering the barrel. This is perhaps the most important part for controlling our flame types!
- Gas Control Valve (on the burner itself): Some burners have a small knob or screw at the base to fine-tune the gas flow, independent of the main lab `gas valve`.
The Science Behind the Flame: Understanding Different Flame Types
One of the most fascinating aspects of the bunsen burner is its ability to produce various Types de flammes by simply adjusting the air intake. Let’s look at the main ones we often encounter:
- Luminous (Yellow) Flame: This occurs when the air vent is mostly closed. There isn’t enough oxygen for complete combustion, leading to the production of unburnt carbon particles that glow yellow. This flame is cooler, “dirty” (produces soot), and less efficient. It’s sometimes called a “safety flame” or “luminous flame.”
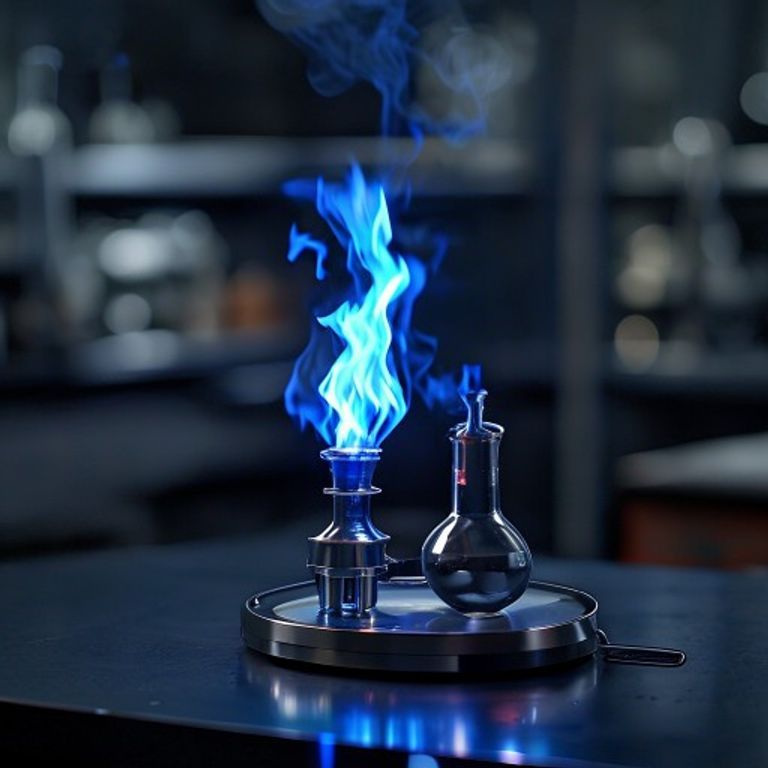
- Non-Luminous (Blue) Flame: By opening the air vent, we allow more oxygen to mix with the gas. This results in complete combustion, producing a clean, hot, and often invisible or pale blue flame. This is the workhorse flame for most scientific applications. We can further differentiate:
- Gentle Blue Flame: A stable blue flame, good for general heating.
- Roaring Blue Flame: With maximum air and gas, this is the hottest flame, characterized by a distinct inner cone. It’s perfect for rapidly heating substances or bending glass.
While the bunsen burner is versatile, some experiments requiring extremely precise or broader heating might use a `meker burner`, which has a wider barrel and a wire gauze top to produce a broader, more even flame, but the principle is very similar.
More Than Just Heating: What is a Bunsen Burner Used For in Science?
The applications of a bunsen burner in science are quite diverse. Here are some of the most common uses:
- Substances de chauffage : This is its primary role. Whether we need to heat a solution in a beaker (often placed on a `tripod stand` with wire gauze) or gently warm a test tube, the bunsen burner provides a controlled heat source.
- Stérilisation: In microbiology, the roaring flame is used to sterilize inoculating loops and the mouths of culture tubes to prevent contamination from airborne microbes.
- Combustion Experiments: Demonstrating burning, testing for flammability, or observing the products of combustion are all common classroom experiments.
- Glass Bending: Skilled technicians use the hot flame to soften and bend glass tubing for custom laboratory setups.
- Essais de flamme: Certain metal ions produce distinctive colors when heated in a flame, which can be used to identify them.
A Glimpse into the Past: History and Invention of the Bunsen Burner
It might surprise you to know that the bunsen burner isn’t named after its inventor in the traditional sense. While commonly credited to Robert Wilhelm Bunsen, a German chemist, he didn’t actually “invent” it from scratch. Instead, in 1855, Bunsen, along with his laboratory technician Peter Desaga, refined an existing design by Michael Faraday. Bunsen’s university in Heidelberg had recently installed a municipal `gas valve` system, and he needed a burner that could provide a clean, soot-free flame suitable for his analytical chemistry work. Desaga’s modification, based on Bunsen’s principles, effectively mixed gas and air, leading to the efficient, clean flame we recognize today. Its simple, robust, and effective design quickly made it an indispensable tool worldwide.
Safety First: Essential Precautions When Using a Bunsen Burner
Working with an open flame always requires extreme caution. Here are vital safety precautions we must always follow:
- Équipements de protection individuelle (EPI): Always wear safety goggles to protect your eyes. Tie back long hair and secure loose clothing.
- Vérifiez les fuites : Before connecting the hose, inspect it for cracks or damage. Ensure the hose is securely attached to both the gas inlet and the lab `gas valve`.
- Espace de travail clair : Keep flammable materials (paper, solvents, etc.) away from the burner. Make sure your `tripod stand` is stable if you’re using one.
- Proper Lighting: Always light the match or igniter *before* turning on the gas. Ignite the gas as soon as it’s turned on to prevent gas buildup.
- Adjust the Flame: Start with a luminous (yellow) flame and then adjust the air vent to achieve the desired non-luminous (blue) flame.
- Ne jamais laisser sans surveillance : An active bunsen burner should never be left unsupervised.
- Extinction appropriée: Turn off the gas at the main lab `gas valve` first, then at the burner if it has a control valve. Allow the burner to cool before touching it.
- Know Emergency Procedures: Be aware of the location of fire extinguishers and fire blankets.
Conclusion: A Pillar of Scientific Discovery
The bunsen burner, with its elegant simplicity and powerful functionality, truly stands as a pillar of scientific discovery. From its humble origins in 19th-century Germany to its ubiquitous presence in modern laboratories, it has facilitated countless experiments and advancements. By understanding its parts, how it works, its diverse uses, and, most importantly, how to operate it safely, we can confidently harness its power to explore the wonders of science. Always remember: respect the flame, and science will reward you!
Foire aux questions (FAQ)
What are the three main parts of a Bunsen burner?
The three main parts are the base, the barrel (or chimney), and the air vent (or collar).
Why is the Bunsen burner flame blue?
The flame is blue (non-luminous) when there is sufficient oxygen mixed with the gas for complete combustion. This complete burning process produces minimal soot and more heat compared to a yellow, luminous flame.
Quelle est la partie la plus chaude d'une flamme de brûleur Bunsen?
The hottest part of a roaring blue flame is typically found at the tip of the inner blue cone, often reaching temperatures well over 1500°C.
Can a Bunsen burner be used to sterilize anything?
Yes, bunsen burners are commonly used to sterilize small metallic instruments like inoculating loops or needles in microbiology by heating them to a red glow, ensuring any microbes present are killed.
What’s the difference between a Bunsen burner and a Meker burner?
While both are gas burners, a `meker burner` typically has a wider barrel and a metal grid or plate at the top. This design allows for a larger volume of gas and air to mix and spread, producing a broader, more uniform flame, which is ideal for heating larger objects evenly, whereas a bunsen burner produces a more concentrated, pointed flame.