Unlocking the Power of Erlenmeyer Flasks: Your Ultimate Guide to Lab Essentials
Introduction: The Iconic Lab Hero You Never Knew You Needed
Halo, Sobat Lab! Have you ever walked into a laboratory and noticed that distinctive, cone-shaped glass container with a cylindrical neck? Yep, that’s right, we’re talking about the trusty erlenmeyer flask! For many of us, it’s just another piece of laboratory glassware, but trust me, these humble flasks are true workhorses in almost every scientific setting. From high school chemistry experiments to advanced research, erlenmeyer flasks play a crucial role. In this article, we’re going to dive deep into what makes them so special, what they’re used for, and how to get the most out of yours. So, let’s unlock the power of this essential lab tool together!
What Exactly is an Erlenmeyer Flask?
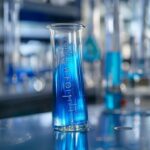
First things first, let’s get acquainted. An erlenmeyer flask, also often called a conical flask, is a type of laboratory flask that features a flat, wide base, a conical body, and a cylindrical neck. It was invented by German chemist Emil Erlenmeyer in 1860, hence the name. Unlike a beaker, which has straight sides, the tapered body of an erlenmeyer flask makes it incredibly versatile. Think of it like a funnel and a container rolled into one, designed for both holding and mixing. Its unique design minimizes solvent evaporation, which is a huge plus, especially when we’re dealing with volatile liquids.
What Are Erlenmeyer Flasks Used For? More Than You Think!
The beauty of erlenmeyer flasks lies in their adaptability. So, what are erlenmeyer flasks used for exactly? Well, let me tell you, the list is quite extensive!
Titration Experiments
This is probably one of their most famous applications. The narrow neck allows us to easily add reagents from a burette while swirling the flask to ensure thorough mixing without spilling. The conical shape also means we can give it a good swirl, or even use a magnetic stirrer, to mix solutions efficiently during titration, making it a staple for analytical chemistry.
Mixing and Swirling Solutions
Because of their conical shape, erlenmeyer flasks are perfect for swirling liquids. This design prevents splashes and reduces spillage compared to a beaker. They’re excellent for preparing solutions where you need to dissolve a solid or mix two liquids thoroughly. If you’re looking for more advanced techniques on mixing and agitation in your lab, you might want to explore the secrets of “Système Agitation Verrerie” and our ultimate lab mixing guide.
Heating and Boiling Liquids
Many erlenmeyer flasks are made from heat-resistant glass, like borosilicate, allowing them to be heated directly on a hot plate or with a Bunsen burner. The narrow neck can also be stoppered to reduce evaporation during heating or to create a closed system for reactions.
Yeast Starters and Cell Cultures
For homebrewers or microbiologists, an erlenmeyer flask for yeast starters is a common sight. The conical shape provides a large surface area for aeration when swirled, which is essential for healthy yeast growth. Plus, the narrow neck can be easily covered with foil or an airlock, maintaining sterility while allowing gas exchange.
Temporary Storage
While not ideal for long-term storage, they’re great for holding solutions temporarily during an experiment. The narrow opening can be easily sealed with a stopper or parafilm to protect the contents from contamination or evaporation.
Why Borosilicate Glass is Your Best Friend (and Worth the Investment)
When you’re looking to buy borosilicate glass erlenmeyer flasks, you’re making a smart choice. Most high-quality lab glassware, including erlenmeyer flasks, is made from borosilicate glass. Why? Because it’s incredibly durable and resistant to thermal shock. This means it can withstand rapid changes in temperature without cracking, which is crucial when you’re heating solutions or cooling them down. It also has excellent chemical resistance, ensuring your experiments aren’t contaminated by reactions with the glass itself. Think of it as the superhero of glass – strong, stable, and ready for action!
Different Sizes for Different Needs
Just like shoes, erlenmeyer flasks come in a variety of sizes! You’ll find them ranging from tiny 10 mL flasks, perfect for micro-scale reactions, all the way up to massive 5000 mL (5-liter) flasks for large-batch preparations. The most common sizes we use in labs are typically 125 mL, 250 mL, 500 mL, and 1000 mL. Having different sizes of erlenmeyer flasks on hand ensures you always have the right vessel for the job, whether you’re performing a delicate titration or preparing a bulk solution.
Keeping Them Pristine: How to Clean Erlenmeyer Flasks
Proper cleaning is key to accurate results and the longevity of your glassware. Here’s a quick guide on how to clean erlenmeyer flasks:
- Rinse Immediately: As soon as you’re done with an experiment, rinse the flask with tap water to remove any residual chemicals. This prevents them from drying and caking onto the glass.
- Use Detergent and Brush: For most general cleaning, a good scrub with laboratory detergent and a bottle brush will do the trick. The conical shape makes it easy to reach all internal surfaces.
- Acid/Base Wash (If Needed): For stubborn residues, a soak in a dilute acid (like HCl) or base (like NaOH) solution might be necessary. Always handle acids and bases with extreme caution and proper PPE!
- Rinse Thoroughly: After washing, rinse the flask multiple times with tap water, then follow with several rinses of distilled or deionized water. This ensures no contaminants from tap water are left behind.
- Dry: Invert the flask on a drying rack or use a glassware dryer. Avoid wiping the inside with a cloth, as this can introduce fibers or contaminants.
Remember, a clean flask is a happy flask, and it’s essential for reproducible experimental results!
Conclusion: The Unsung Hero of the Lab Bench
There you have it! The humble erlenmeyer flask truly is an indispensable piece of lab equipment. Its ingenious design, versatility, and durability make it a go-to choice for countless applications, from precise titrations to robust yeast cultures. We’ve explored what are erlenmeyer flasks used for, why borosilicate glass is superior, the importance of having different sizes of erlenmeyer flasks, and practical tips on how to clean erlenmeyer flasks. So next time you grab one, take a moment to appreciate this unsung hero of the lab bench!
FAQ: Your Burning Questions Answered!
Q: Can I heat an erlenmeyer flask directly over a flame?
A: Yes, if it’s made of borosilicate glass. However, always heat gradually and use a wire gauze with a ceramic center to distribute the heat evenly and prevent direct contact with the flame, which can cause localized overheating.
Q: What’s the main difference between an erlenmeyer flask and a beaker?
A: The key difference is their shape. Erlenmeyer flasks have a conical body and narrow neck, making them ideal for swirling, mixing, and minimizing evaporation. Beakers have straight sides and a wider mouth, making them better for general mixing, holding larger volumes, and pouring liquids.
Q: Are erlenmeyer flasks accurate for measuring volumes?
A: No, erlenmeyer flasks are designed for holding and mixing, not for precise volume measurement. They have approximate volume markings, but for accurate measurements, you should use calibrated measuring flasks like graduated cylinders or volumetric flasks.
Q: Can I use an erlenmeyer flask in an autoclave?
A: Yes, borosilicate glass erlenmeyer flasks are autoclavable, making them suitable for sterilizing media or preparing sterile solutions. Just ensure the cap or stopper is loosened to prevent pressure buildup during the cycle.