The Complete Guide to Laboratory Desiccators: Choosing, Using, and Maintaining Your Moisture‑Control Champion
Introduction
When we work with moisture‑sensitive samples—whether it’s hygroscopic powders, reactive chemicals, or delicate biological specimens—keeping the environment dry is non‑negotiable. That’s where a laboratory desiccator becomes our best friend. Think of it as a tiny, airtight pantry that constantly sucks out humidity, ensuring our samples stay pristine. In this guide, I’ll walk you through everything you need to know: from picking the right model (including options with silica gel and temperature control) to daily maintenance tips that keep the desiccator performing like new.
What Is a Laboratory Desiccator?
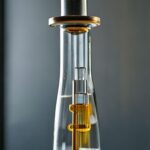
A laboratory desiccator is a sealed container, usually made of glass or acrylic, equipped with a desiccant (like silica gel or molecular sieves) that absorbs moisture from the air inside. Some advanced units also feature a temperature‑controlled chamber, giving you extra control over the drying environment.
Key Features to Look For
- Material: Borosilicate glass offers chemical resistance and high temperature tolerance, while acrylic is lighter and less breakable.
- Seal Quality: A rubber or silicone gasket ensures an airtight closure. Test the seal by placing a piece of paper over the lid and pulling it—if the paper lifts, the seal is good.
- Desiccant Type: Silica gel is the most common, but for extremely low humidity you might need molecular sieves.
- Temperature Control: Some models let you set a specific temperature (e.g., 25 °C to 60 °C) to speed up drying or to keep samples at a constant temperature.
- Size & Capacity: Choose a chamber that comfortably fits your sample containers while leaving room for airflow.
Laboratory Desiccator with Silica Gel
Silica gel is the go‑to desiccant for most labs because it’s cheap, reusable, and effective across a wide humidity range. When buying a desiccator that includes silica gel, consider:
- Indicator beads that change color when saturated—this gives a visual cue for regeneration.
- A removable tray for easy replacement or regeneration (heat in an oven at 120 °C for 2 hours).
Temperature‑Controlled Desiccators
If you need to dry samples faster or maintain a specific temperature for stability, a temperature‑controlled desiccator is worth the investment. These units combine a heating element with a thermostat, allowing precise set‑points. They’re especially handy for:
- Drying hygroscopic salts that release moisture slowly.
- Storing temperature‑sensitive reagents that degrade at room temperature.
Just remember to calibrate the thermostat periodically—think of it like tuning a musical instrument; a small offset can throw off the whole experiment.
Glass Chamber Specifications
When the spec sheet mentions “glass chamber,” pay attention to:
- Thickness: 6 mm or more for durability.
- Dimensions: Internal volume should be at least 1.5× the size of your largest container.
- Heat Resistance: If you plan to use the desiccator in a heated environment, look for a chamber rated up to 200 °C.
Practical Tips for Using a Desiccator
- Pre‑condition the chamber: Before placing samples, run the desiccator for 30 minutes empty to achieve the lowest possible humidity.
- Arrange samples wisely: Keep items spaced apart; crowding blocks airflow and reduces drying efficiency.
- Monitor desiccant status: Replace or regenerate silica gel when the indicator turns pink (or whatever color your brand uses).
- Avoid rapid temperature changes: Sudden cooling or heating can cause condensation inside the chamber.
Maintenance and Cleaning Guide
Keeping your desiccator clean extends its life and prevents cross‑contamination.
- Weekly wipe‑down: Use a lint‑free cloth dampened with 70 % ethanol to clean the interior glass.
- Monthly deep clean: Disassemble the lid, gasket, and desiccant tray. Soak the tray in warm soapy water, rinse, and dry completely before re‑adding fresh silica gel.
- Gasket care: Inspect the seal for cracks. A damaged gasket should be replaced immediately to maintain airtightness.
- Calibration check: If your desiccator has a built‑in hygrometer, compare its reading with a calibrated external hygrometer every 3 months.
Integrating the Desiccator with Other Lab Equipment
While the desiccator handles moisture, you’ll often need complementary tools—like conductivity meters for checking water content after drying. For a deeper dive into selecting the right device, see our conductivity meters guide. Similarly, if you’re interested in color analysis of dried samples, the colorimeters guide can be a handy reference.
Conclusion
Choosing the right laboratory desiccator—and maintaining it properly—can save you time, money, and a lot of experimental headaches. Whether you opt for a simple silica‑gel unit or a high‑tech temperature‑controlled chamber, the key is to match the features with your sample’s needs and to stay on top of regular cleaning and desiccant regeneration. With these practices in place, your moisture‑sensitive samples will stay dry, stable, and ready for analysis.
FAQ
Q: How often should I regenerate silica gel?
A: Typically every 2–4 weeks, or sooner if the indicator changes color.
Q: Can I store biological samples in a desiccator?
A: Yes, as long as the temperature range is suitable and the samples are not prone to drying‑induced damage.
Q: Is it safe to heat a glass desiccator directly on a hot plate?
A: Only if the manufacturer explicitly states the glass can withstand direct heating. Otherwise, use a separate heating element designed for the unit.
Q: What’s the difference between silica gel and molecular sieves?
A: Silica gel works well for moderate humidity (up to ~10 % RH). Molecular sieves can achieve ultra‑low humidity (<1 % RH) but are more expensive.
Q: How do I know if my desiccator’s seal is compromised?
A: Perform a simple leak test: place a piece of paper over the lid, close it, and try to pull the paper away. If it lifts, the seal is still good; if not, the gasket may need replacement.