


Dévoilement du Héros Humble: Votre guide essentiel du Bécher Chimie

In the vast and often complex world of chemistry, some tools are flashy and intricate, while others are simply workhorses – foundational pieces that make almost every experiment possible. Today, we’re diving deep into one such unsung hero: the chemistry beaker. If you’ve ever stepped foot in a lab, whether in school or a professional setting, you’ve undoubtedly encountered this ubiquitous piece of verrerie de laboratoire. But have we truly appreciated its versatility and understood its nuances?
Join me as we explore everything there’s to know about these transparent vessels. From their basic design to practical tips for handling and cleaning, we’ll make sure you’re an expert on this essential piece of matériel de laboratoire.
What Exactly is a Chemistry Beaker?
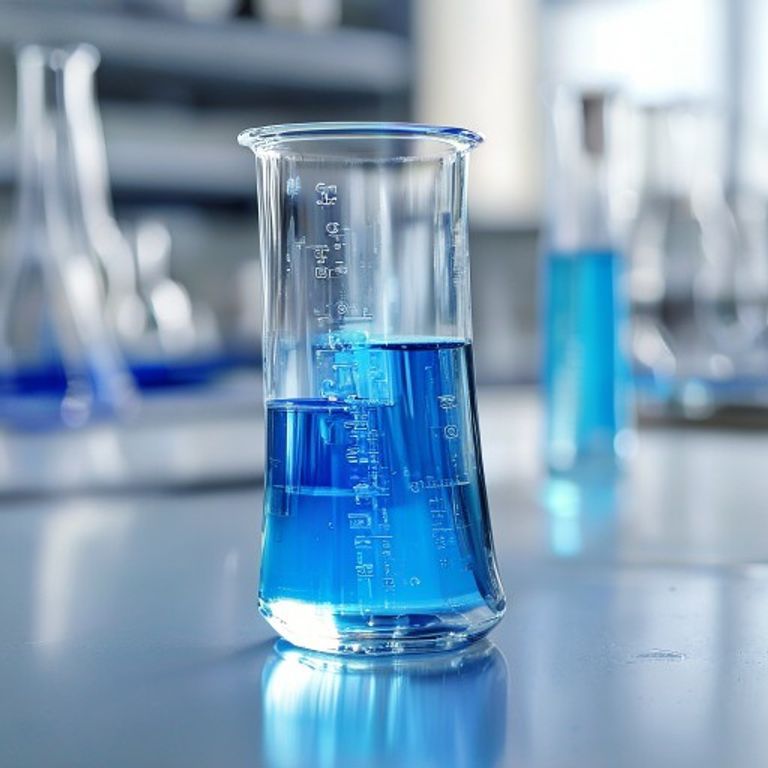
Dans son cœur, chemistry beaker is a cylindrical container, typically made of borosilicate glass (think Pyrex or Kimax for excellent heat and chemical resistance) or sometimes plastic. It features a flat bottom and a small spout or ‘beak’ for easy pouring. You’ll often see volume markings on the side, but here’s a crucial piece of advice we’ll dive into more deeply: these markings are generally for estimation, not for precise measurement. Think of them like the rough volume indicators on a kitchen mixing bowl, not the precise lines on a measuring jug.
Beakers come in various sizes, from a tiny 5 mL to a massive 10,000 mL or more, making them incredibly adaptable for different experimental scales.
Types of Chemistry Beakers: Beyond the Basics
While the classic form is what most of us picture, there are actually a few common types of chemistry beakers:
- Griffin Beaker (Low Form): This is the most common type. It has a height roughly 1.4 times its diameter, a spout, and often a graduated scale. Its wide opening makes it perfect for stirring and easy access.
- Berzelius Beaker (High Form): Taller and narrower than the Griffin beaker, with a height about twice its diameter. This design is useful for reducing evaporation or when a stirring rod might need more vertical clearance.
- Flat-Bottom Beaker: Less common, these lack the traditional spout and are often used for specific heating applications or as general containers.
Most beakers you’ll encounter are made of borosilicate glass, prized for its resistance to thermal shock and chemical attack. However, plastic beakers (polypropylene or PTFE) are also available, especially for applications where glass might be too fragile or react with certain chemicals, though they typically have lower heat resistance.
More Than Just a Cup: Uses of Beakers in the Chemistry Lab
The versatility of beakers truly shines when we look at the diverse uses of beakers in a chemistry lab. While they might look simple, they’re indispensable for countless tasks:
- Mélange et mélange: Their wide mouth and cylindrical shape are ideal for combining liquids and solids, whether you’re using a stirring rod or a magnetic stirrer.
- Liquides de chauffage: Borosilicate glass beakers are designed to withstand direct heating over a Bunsen burner or on a hot plate. This makes them perfect for warming solutions, dissolving solids, or carrying out reactions that require elevated temperatures. Remember the critical safety protocols when working with heat!
- Détention et transfert de liquides : Need to temporarily store a solution? Or transfer a liquid from one container to another? Beakers are your go-to. Their spouts make pouring smooth and minimize spills.
- Rough Measurements: As we mentioned, the volume markings are approximate. If you need to quickly estimate 100 mL for a non-critical step, a beaker will do. But if precision is key, we typically reach for more accurate tools. For instance, when we need exact volumes, we always opt for a graduated cylinder meaning and why it’s crucial in your lab.
- Réactions : Many chemical reactions can be safely carried out within a beaker, especially those that generate some heat or gas.
Handling with Care: Chemistry Beaker Safety Tips
Even though beakers are robust, they are still made of glass and require careful handling to ensure sécurité de la verrerie in the lab. Here are some essential chemistry beaker safety tips:
- Vérifier avant utilisation: Always check your beaker for any chips, cracks, or scratches before using it. A damaged beaker can shatter unexpectedly, especially when heated.
- Protection des yeux : This is non-negotiable in any lab setting, especially when working with glassware and chemicals.
- Use Proper Grips: Hold beakers by the body, not just the spout, especially when full. Use appropriate tongs or heat-resistant gloves when handling hot beakers.
- Avoid Sudden Temperature Changes: While borosilicate glass is thermal shock resistant, extreme and sudden changes (like pouring boiling liquid into a very cold beaker, or vice versa) can still cause breakage.
- Never Heat a Dry Beaker: Always have some liquid in the beaker if you’re heating it to prevent localized overheating and potential damage.
- Nettoyer immédiatement : Residues can be harder to remove if left to dry. More on cleaning below!
Keeping It Clean: How to Clean Chemistry Beakers
Proper cleaning is vital not only for safety but also to prevent contamination in future experiments. Here’s a quick guide on how to clean chemistry beakers:
- Rincer immédiatement : As soon as you finish using a beaker, rinse it with tap water to remove most of the residues.
- Utiliser Détergent et brosse : For stubborn residues, use a laboratory-grade detergent and a beaker brush to scrub the inside and outside thoroughly. Make sure to get into all corners.
- Rincer avec de l'eau distillée: After scrubbing, rinse the beaker multiple times with tap water, then finish with several rinses of distilled or deionized water. This prevents mineral deposits from tap water.
- Sécher correctement: You can let them air dry on a drying rack, or for faster drying, place them in a drying oven (if safe for the material and any residual chemicals). Avoid wiping with cloths that might leave fibers.
For particularly challenging residues, specific chemical cleaning solutions might be necessary, but always consult safety data sheets and lab protocols first.
FAQ About Chemistry Beakers
Q: Can I use a chemistry beaker for precise measurements?
A: No, absolutely not! While beakers have volume markings, they are not precise measuring tools. For accurate liquid volumes, always use a cylindre gradué, volumetric flask, or pipette.
Q: What’s the difference between a beaker and an Erlenmeyer flask?
A: Both are common lab vessels. A beaker has straight sides and a wide mouth, making it good for mixing and pouring. An Flasque Erlenmeyer, on the other hand, has a conical body and a narrow neck, which reduces evaporation, is better for swirling without spilling, and can be easily stoppered.
Q: Are all chemistry beakers made of glass?
A: While most common lab beakers are made of borosilicate glass, plastic versions (like polypropylene) are also available. These are useful for applications where glass breakage is a concern or with certain chemicals that might etch glass, though they have lower heat resistance.
Conclusion
Les humbles chemistry beaker, despite its simple appearance, is an absolute cornerstone of any laboratory. Its incredible versatility for mixing, heating, and holding makes it an indispensable tool for chemists and scientists across various disciplines. By understanding its different types, proper uses, and, most importantly, critical safety and cleaning practices, we can ensure efficient and safe experiments every time. So next time you grab a beaker, give a nod to this fundamental piece of matériel de laboratoire – it truly is the unsung hero of the lab!







