Unlocking Laboratory Precision: Your Essential Guide to Graduated Cylinders

In the vast world of science, precision is everything. And when we talk about measuring liquid volumes in the laboratory, one humble piece of glassware often comes to mind: the graduated cylinder. We’ve all probably encountered it at some point, whether in a high school chemistry class or a sophisticated research lab. But do we truly understand its full potential and how to use it correctly?
Today, we’re going to dive deep into the world of the graduated cylinder – often simply called a measuring cylinder. We’ll cover everything from its fundamental uses and how to read it accurately, to the different types available and proper maintenance. Our goal is to equip you with all the practical knowledge you need to master this essential laboratory tool.
What Exactly is a Graduated Cylinder?
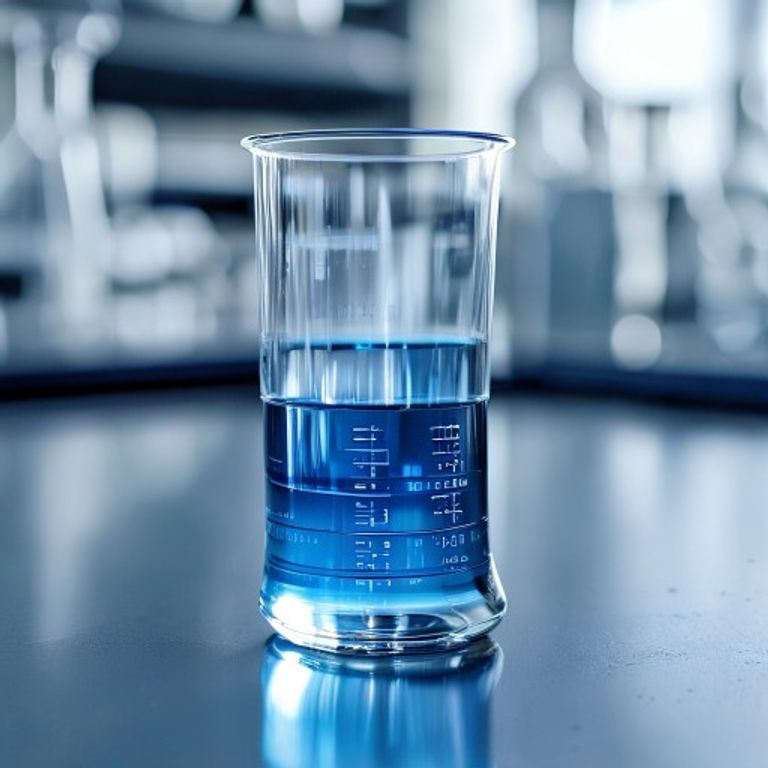
At its core, a graduated cylinder is a tall, cylindrical container with a spout, featuring a series of marked lines (graduations) along its side. These markings allow us to measure the volume of liquids with a reasonable degree of accuracy. Think of it as the slightly more precise, grown-up cousin of your kitchen measuring cup, but specifically designed for the delicate dance of laboratory work. Unlike beakers or flasks, which are primarily for holding or mixing, the graduated cylinder’s main purpose is volume measurement.
It’s an indispensable part of laboratory glassware, designed for clear, easy-to-read measurements. The base is usually wide and flat to ensure stability on a lab bench, preventing accidental spills – a common concern when handling chemicals!
Why Do We Use Graduated Cylinders? Essential Uses in the Lab
While not the most precise tool for every task, the graduated cylinder plays a crucial role in many everyday lab procedures. Its versatility makes it a go-to for various applications. Here are some of the essential measuring cylinder uses:
- Preparing Solutions: We often need to measure out specific volumes of solvents or reagents to create solutions of a desired concentration. A graduated cylinder offers the accuracy needed for many of these preparations.
- Transferring Liquids: When we need to transfer a known volume of liquid from one container to another, say from a stock bottle to a beaker for a reaction, the graduated cylinder is ideal.
- Collecting Liquids: In experiments involving filtration or distillation, where we need to collect a certain volume of filtrate or distillate, a graduated cylinder can be used to monitor the volume collected.
- Approximate Titrations: While a burette offers much higher precision for titrations, a graduated cylinder can sometimes be used for very rough or preliminary titrations to get an idea of the required volume.
Its speed and ease of use make it perfect for tasks where high precision isn’t paramount, but reliable, consistent measurements are still required.
Decoding the Marks: How to Read a Graduated Cylinder Like a Pro
This is where many people can stumble, but it’s actually quite straightforward once you know the trick! The most important concept here is the meniscus.
When you pour a liquid into a graduated cylinder, you’ll notice that the surface isn’t perfectly flat. For most aqueous solutions, the liquid surface curves downwards, forming a U-shape. This curve is called the meniscus. To get an accurate reading, we always read the bottom of this curve.
Here’s how to do it correctly:
- Place on a Flat Surface: Always put the graduated cylinder on a level surface. Trying to read it while holding it in your hand can introduce errors.
- Eye Level is Key: Crouch down so your eye is perfectly level with the bottom of the meniscus. If you read from above, the volume will appear lower than it actually is (parallax error). If you read from below, it will appear higher.
- Identify the Smallest Graduation: Look at the markings. For example, if it’s a 100 mL cylinder, it might have major marks every 10 mL, smaller marks every 1 mL, and even finer marks every 0.2 mL. Understand what each line represents.
- Estimate the Final Digit: You should read the volume to one decimal place beyond the smallest marked increment. If the smallest mark is 1 mL, you should estimate to 0.1 mL. For example, if the meniscus is between 25 mL and 26 mL, and it looks to be about two-tenths of the way up from 25 mL, you’d read it as 25.2 mL.
Practice makes perfect! Soon, reading the meniscus will become second nature.
Beyond the Basics: Types of Graduated Cylinders and Their Accuracy
Not all graduated cylinders are created equal! There are variations in materials and accuracy classes:
- Accuracy Classes:
- Class A: These are generally used for analytical work where higher precision is required. They have a tighter tolerance and often come with a certificate of calibration.
- Class B: These are suitable for general laboratory work where the highest precision isn’t critical. They have wider tolerances compared to Class A.
- Comparison with Other Volumetric Tools: While excellent for many tasks, it’s important to understand the graduated cylinder’s place in the hierarchy of volume measurement tools. It’s more accurate than a beaker or an Erlenmeyer flask, but less accurate than a pipette function is critical in every lab or a volumetric flask. Volumetric flasks are designed to contain a very specific, highly accurate volume, and pipettes are made to deliver highly accurate, smaller volumes. So, for ultimate precision in measuring exact volumes, we would often turn to those tools.
What Are They Made Of? Materials Matter
The material of a graduated cylinder impacts its durability, chemical resistance, and even how accurately it can be read.
- Glass Graduated Cylinders:
- Pros: Excellent chemical resistance to most reagents (especially borosilicate glass), clear visibility, and can be autoclaved (heat sterilized). They tend to maintain their shape and calibration over time.
- Cons: Fragile and can break if dropped or subjected to thermal shock.
- Plastic Graduated Cylinders:
- Pros: Much more durable and less prone to breakage, making them safer for student use or in environments where glass might be a hazard. They are also lighter. Common plastics include polypropylene (PP) and polymethylpentene (PMP). PMP offers better clarity than PP.
- Cons: Can be less chemically resistant to certain solvents compared to glass. Over time, some plastics can leach chemicals or absorb substances, and they might not be as precise due to expansion/contraction. They can also become cloudy with repeated use or exposure to harsh chemicals.
Keeping It Clean: The Right Way to Maintain Your Graduated Cylinder
Proper cleaning and maintenance are crucial for ensuring the longevity and accuracy of your graduated cylinder. A dirty cylinder can lead to inaccurate readings and contaminated experiments!
Here’s a basic cleaning a graduated cylinder procedure:
- Rinse Immediately: As soon as you’re done with an experiment, rinse the cylinder with distilled water. This prevents chemicals from drying and sticking to the glass or plastic.
- Wash with Detergent: Use a mild laboratory detergent and a brush specifically designed for glassware. Make sure to scrub the inside thoroughly.
- Rinse Thoroughly: Rinse multiple times with tap water, then follow with several rinses of distilled or deionized water to remove all traces of detergent and impurities.
- Air Dry or Oven Dry (Glass Only): For glass cylinders, you can air dry it upside down on a drying rack or use a low-heat oven. Plastic cylinders should always be air-dried to prevent warping.
- Inspect: Before storing, always inspect for any residual film or damage.
Remember, a clean tool is a reliable tool!
Conclusion
The graduated cylinder may seem like a simple piece of equipment, but as we’ve explored, its proper understanding and use are fundamental to accurate and successful laboratory work. From knowing what it’s used for, to mastering how to read the meniscus, and understanding the nuances of its materials and care, each detail contributes to precise volume measurement.
So, the next time you pick up a graduated cylinder, you’ll do so with confidence, knowing you have the skills to make your measurements count. Happy experimenting!
Frequently Asked Questions (FAQ)
Q: What’s the difference between a graduated cylinder and a beaker?
A: A beaker is primarily for holding, mixing, or heating liquids, and its volume markings are very approximate. A graduated cylinder is specifically designed for measuring liquid volumes with significantly higher accuracy than a beaker.
Q: Can I heat a graduated cylinder?
A: Generally, no. Most graduated cylinders (especially plastic ones) are not designed for heating. While borosilicate glass cylinders can withstand some heat, they are not meant for direct flame heating or high-temperature reactions, as it can affect their calibration and potentially cause breakage. Always use beakers or flasks for heating.
Q: How do I choose the right size graduated cylinder?
A: Always choose the smallest graduated cylinder that can comfortably hold the volume you need to measure. For example, if you need to measure 25 mL, a 50 mL cylinder will give you a more accurate reading than a 250 mL cylinder, because the smaller cylinder has finer graduations relative to its total volume.
Q: What is the primary source of error when using a graduated cylinder?
A: The most common source of error is parallax error, which occurs when the eye is not level with the meniscus, leading to an incorrect reading. Other sources include incorrect reading of the meniscus and calibration errors if the cylinder is damaged or old.