Unlocking the Power of a Stirring Rod: Practical Uses, Safety Tips, and How‑to Guide for Every Chemistry Lab
Introduction
When I first stepped into a chemistry lab, the humble glass stirring rod seemed almost too simple to matter. Yet, as I started mixing solutions, decanting liquids, and fine‑tuning reactions, I quickly realized this slender piece of glass is a true workhorse. In this article we’ll explore stirring rod uses from the basics to some clever tricks, and I’ll share step‑by‑step tips on how to use one safely and effectively.
What Is a Stirring Rod Made Of and Why Does It Matter?
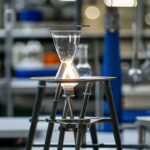
A typical stirring rod is made of borosilicate glass, the same material you find in most laboratory glassware. Borosilicate resists thermal shock, so you can stir hot solutions without worrying about cracks. Some labs also use plastic or stainless‑steel rods for specialized tasks, but glass remains the most versatile choice because it’s chemically inert and transparent.
Core Applications of a Stirring Rod in the Laboratory
1. Mixing Solutions and Homogenizing Reagents
Whether you’re preparing a dilute acid or a complex buffer, a stirring rod ensures uniform distribution of solutes. Simply dip the rod into the liquid and rotate it in a circular motion—think of it like stirring a cup of coffee, but with more precision.
2. Decanting Liquids Without Splashing
When you need to pour a clear supernatant from a precipitate, place the rod against the wall of the beaker. The rod guides the liquid flow, reducing turbulence and preventing the solid from being disturbed.
3. Breaking Up Crystals and Facilitating Dissolution
Adding a solid to a solvent often creates clumps. Gently tapping the rod against the side of the container helps break those clumps apart, speeding up dissolution.
4. Assisting in Temperature Control
In exothermic reactions, you can use the rod to stir quickly, dispersing heat more evenly and avoiding hot spots that could lead to runaway reactions.
How to Use a Stirring Rod in a Chemistry Lab – Step by Step
- Step 1: Inspect the rod. Look for cracks or chips. A damaged rod can break and contaminate your sample.
- Step 2: Hold it correctly. Grip the rod near the top with your thumb and forefinger, leaving the lower part free to move.
- Step 3: Insert gently. Place the tip into the liquid at an angle to avoid splashing.
- Step 4: Stir in a circular motion. Rotate the rod clockwise or counter‑clockwise, maintaining a steady speed. For viscous solutions, increase the pressure slightly.
- Step 5: Monitor the reaction. Watch for color changes, precipitation, or gas evolution while you stir.
- Step 6: Remove and clean. Lift the rod straight up, wipe it with a lint‑free cloth, and rinse with distilled water.
Safety First: Using a Stirring Rod Safely
Even though a glass rod is low‑risk, proper handling prevents accidents:
- Never use a cracked rod—replace it immediately.
- Avoid applying excessive force; the rod can break under sudden impact.
- When stirring hot liquids, wear heat‑resistant gloves and use a rod with a longer handle to keep your hands away from steam.
- Never stir volatile or highly reactive mixtures in an open container; use a fume hood and consider a magnetic stir bar instead.
Beyond Simple Mixing: Creative Stirring Rod Uses
While the primary job is mixing, clever chemists have found additional uses:
- Guiding a pipette tip. Rest the rod against the side of a beaker to steady a pipette while drawing liquid.
- Measuring liquid level. Touch the rod to the liquid surface; the meniscus will cling to the glass, giving a quick visual cue.
- Cleaning narrow glassware. Slip the rod through capillary tubes to dislodge residues.
Maintaining Your Glass Stirring Rod
Proper care extends the rod’s life:
- Rinse thoroughly after each use to remove chemicals.
- Store rods vertically in a dedicated rack to avoid accidental breakage.
- Periodically inspect for micro‑scratches that could harbor contaminants.
Related Lab Tools You Might Need
If you’re building a well‑rounded lab setup, consider pairing your stirring rod with other essential items. For instance, why wire gauze is a must‑have in every chemistry lab ensures even heating under a Bunsen burner, while the humble stirring rod guide offers deeper insights into material choices and advanced techniques.
Conclusion
From basic mixing to precise decanting, the stirring rod proves that simple tools can have a big impact. By understanding its material, mastering safe handling, and exploring creative applications, you’ll get more reliable results and a smoother workflow in any chemistry lab. So the next time you reach for that glass rod, remember it’s not just a stick—it’s your silent partner in discovery.
FAQ
Q: Can I use a plastic stirring rod for acidic solutions?
A: Plastic rods may degrade in strong acids, leading to contamination. Stick with borosilicate glass for most acid‑base work.
Q: How often should I replace my stirring rod?
A: Replace it immediately if you notice cracks, chips, or persistent scratches that are hard to clean.
Q: Is a magnetic stir bar a better alternative?
A: Magnetic stir bars are great for continuous stirring, especially in sealed vessels, but they can’t replace the tactile control a glass rod offers for tasks like decanting.
Q: Can I sterilize a glass stirring rod?
A: Yes—autoclave at 121 °C for 15 minutes or soak in 70 % ethanol, then rinse with distilled water.
Q: What other lab equipment pairs well with a stirring rod?
A: A beaker, funnel, and a pair of lab tongs are common companions, and of course, a good set of lab spatulas for solid handling.